Single Sign-On (SSO) Configuration Guide
- 20 Jun 2023
- 17 Minutes to read
- Print
- DarkLight
- PDF
Single Sign-On (SSO) Configuration Guide
- Updated on 20 Jun 2023
- 17 Minutes to read
- Print
- DarkLight
- PDF
Article Summary
Share feedback
Thanks for sharing your feedback!
The Mindful platform supports several Single Sign-On (SSO) identity providers and protocols for a seamless SSO integration. This guide covers the step-by-step processes for configuring the Okta, Auth0, and Azure Active Directory (Azure AD) identity providers with the OpenID Connect (OIDC) and Security Assertion Markup Language (SAML) protocols. Whether you are new to SSO or simply looking to optimize your existing configuration, this guide provides all the information you need to successfully configure SSO with Mindful.
In this guide:
Okta
Okta is an identity management and access control platform that allows organizations to manage their users, groups, and devices in a central location, and control their access to different resources based on policies and rules. Okta supports various authentication and authorization standards and protocols, including SAML and OIDC (see below for more on these protocols).
This section covers the Okta SSO integration. Topics covered:
- Creating users in Okta
- Creating and assigning groups
- Adding the groups claim
Click for Okta configuration instructions
You will need an Okta account to begin. For testing purposes, Okta provides an unlimited free tier called the Starter Plan. See the Okta Getting Started guide for more information.
Create Users in Okta
- Navigate to Directory > People.
- Click Add Person.
- Enter values into the fields for First Name, Last Name, Username and Email.
- Once the user has been created, assign the user to the application by clicking the user's name, then clicking Assign Applications.
- Locate and select the OIDC application from the list.
.png?sv=2022-11-02&ss=b&srt=o&spr=https&st=2024-04-19T13%3A49%3A02Z&se=2024-04-19T13%3A59%3A02Z&sp=r&sig=fcwYswE1Zvqf4MHxJg8PgCH8ho6QZUp6lZ%2BpS7GzDA4%3D)
Create and Assign Groups in Okta
- Navigate to Directory > Groups.
- Click Add Group.
- Enter a name and description for the group. Take note of the group name as this will be used later.
- Select the newly created group from the list, then click Manage People. This will display a list page where you can select the users who will be members of the group.

Add the Groups Claim
In order for the Mindful application to read your Okta groups, you'll need to do a bit more setup.
- Navigate to Security > API.
- Click the default authentication server listed.
- Click the Scopes tab, then click Add Scope.
- Enter the following values, then click Create:

- Next, click the Claims tab, then click Add Claim.
- Enter the following values, then click Create:

Okta via OIDC
OIDC extends OAuth 2.0 by adding an additional layer of user authentication, making it suitable for SSO integrations with authorization servers like Okta. Your Okta platform can utilize OIDC to authenticate across multiple applications. When a user logs in to one application using Okta as the identity provider, they are automatically logged in to other applications, such as Mindful, that have also integrated with Okta.
This section covers the Okta SSO integration with OIDC. Topics covered:
- Configuring Okta
- Testing the access and ID tokens
- Configuring your Mindful Organization
- Adding Role Mappings
Click for OIDC and Okta configuration instructions
For initial OIDC/Okta setup instructions, see the getting-started guide in the Okta Help Center.
Configure Okta
Once the OIDC application has been created, make sure the following configuration is in place:
- Users and/or groups should be assigned to the application in the Assignments tab.
- Make sure Authorization Code and Client Credentials are selected.
- Obtain the appropriate value for Sign in Redirect URIs from the Mindful Support team.
- In your OIDC application, navigate to the Sign On tab.
- Click the Edit link next to the OpenID Connect ID Token section.
- Make sure your section looks like the following and then click the Save button

Test the Access and ID Tokens
If you wish to test what your Access and ID Tokens will look like before integration, use the following steps:
- Navigate to Security > API. Select the default authorization server.
- Select the Token Preview tab.
- Enter information into the required fields.
- Select your OIDC app from the list in the OAuth/OIDC Client field.
- In the User field, enter a user that you created in your Dashboard.
- Click Preview Token.

NOTE
View the Token tab to ensure the new token is displayed. It will be in the Token tab because you set up the group claims to live in the Access Token, not the ID Token. If everything is setup properly, you should see a groups section with the groups for user you entered.
Configure your Mindful Organization for OIDC using Okta
Now it's time to link your Mindful Organization to your Okta OIDC account. This step can only be performed by Mindful staff.
Add Role Mappings (Okta to Mindful)
Lastly, you'll need to map your Okta group to Mindful roles.
- Click Add Role Map.
- For Name, enter the same value that you used for your Okta group. Exact capitalization isn't required.
- For Roles, enter the role(s) that the user will be assigned when they log in with a matching group name.
- If more roles are necessary, add those as well. Make sure to click Save to keep your changes.
Okta via SAML
SAML is an XML-based standard for exchanging authentication and authorization data between parties, in our case between an identity provider and a service provider. SAML can be used for implementing SSO and identity management in enterprise environments. Similar to OIDC, SAML can be used by your Okta implementation to manage SSO with Mindful.
This section covers the Okta SSO integration with SAML. Topics covered:
- Setting up SAML in Okta
- Configuring your Mindful Organization
- Adding Role Mappings
- SAML single logout
Click for SAML and Okta configuration instructions
Set up SAML in Okta
- Navigate to Applications and click Create App Integration.
- Select the SAML 2.0 radio button, then click Next.
- Under App Name, enter whatever value you would like, then click Next.
- For Single sign on URL, enter the appropriate URL provided by the Mindful Support team.
- Click Use this for Recipient URL and Destination URL.
- Set the Audience URI(SP Entity ID) to the appropriate value. Contact the Mindful Support team to obtain the Cognito User Pool ID that will be used in the Audience URI for this field.
- Set the Application username to Email.
- Attribute Statements: Add a new entry:
- Name: Enter http://schemas.xmlsoap.org/ws/2005/05/identity/claims/emailaddress
- Name format: Select Unspecified.
- Value: Enter user.email
- Group Attribute Statements: Add a new entry:
- Name: Enter http://schemas.xmlsoap.org/ws/2005/05/identity/claims/groups
- Name format: Select Unspecified.
- Filter: Select Matches regex with a value of .*
- Click Next.
- Select I'm an Okta customer adding an internal app.
- Select This is an internal app that we have created.
- Click Finish.
- Make sure your users and/or groups are assigned to the application by going to the Assignments tab and selecting users/groups.
Configure your Mindful Organization for SAML using Okta
Now it's time to link the Mindful Organization to your Okta SAML account. This step can only be performed by Mindful staff.
Add role mappings (Okta to Mindful)
Now you will need to map your Okta group to Mindful roles.
- Click Add Role Map.
- For Name, enter the same value that you used for your Okta group. Exact capitalization isn't required.
- For Roles, enter the Role or Roles that the user will be assigned when they log in with a matching Group name.
- If more roles are necessary to map, add those as well. Make sure to click the Save button to persist your changes.
SAML Single logout in Okta
When enabled, this will result in a Mindful UI logout also logging out of Okta. It works by Cognito redirecting the UI to Okta after the Cognito logout, with a specially formatted SAML logout package on the query string sent to Okta. Okta verifies this SAML package using the issuer string and a public SSL cert key, and if valid, logs out the user.
To enable:
- In Cognito UserPool > Identity Provider, Enable Sign Out flow.
- In Okta > Applications > Edit > SAML Configuration > Edit, select Show Advanced Settings.
- Select the Enable Single Logout setting.
Next, complete the form as follows:
- Single Logout URL: Enter the appropriate value provided by the Mindful Support team.
- SP Issuer: Enter urn:amazon:cognito:sp:<user pool id>
- Signature Certificate: Obtain the Signing Certificate from the Cognito AWS console, then format it to .crt format. Otherwise, Okta won’t accept it.
- Add the correct header/footer.
- Insert line breaks every 64 characters.
- Save the file with a .crt extension.
EXAMPLE
Sample certificate with line breaks added every 64 characters:
-----BEGIN CERTIFICATE-----

MIICvDCCAaSgAwIBAgIIOc0ggmd46TMwDQYJKoZIhvcNAQELBQAwHjEcMBoGA1UE

AwwTdXMtZWFzdC0xX3ZVbXlKcUVSZjAeFw0yMjA3MTgxNzU0MzRaFw0zMjA3MTgx

...etc...

fDAL+E3i7TTP9TVZkUt0hKaUGi3/SMF3xrMVVITLrTqYhZzHq+PtPMqZBb8ugI6N

+mMIF6JDN7OiU5y2ARg6xdB4t5gl04GjdbI9cIEGaOo=

-----END CERTIFICATE-----
Auth0
Auth0 is an identity management platform that provides authentication and authorization as a service. Auth0 supports a variety of identity providers and provides features such as multifactor authentication and user management. Auth0 supports various authentication and authorization standards and protocols, including SAML and OIDC (see below for more on these protocols).
This section covers the Auth0 integration. Topics covered:
- Creating users in Auth0
- Creating and assign roles
- Adding the role claim
Click for Auth0 configuration instructions
You can use this article from Auth0 to get started creating an Auth0 application. The steps below cover creating users and managing roles.
Create users in Auth0
- Navigate to User Management > Users and click Create User.
- Enter the fields (all are required) in order to create the user:

Create and Assign Roles in Auth0
- Navigate to User Management > Roles and click Create Role.
- Enter a role name and description. Take note of the role name for later use.
- From either the Userslist page or the Roleslist page, you can link users to roles.
Add the Role Claim
In order for the Mindful application to read your Auth0 role, we have to do some setup to make sure they can be read.
- Navigate to Actions > Library.
- Click Build Custom at the top.
- Give the new Action a name and make sure the Trigger is Login/Post Login. This will run some custom code on a user's login that will add the role claim to the id and access tokens.
- Once created, you will be presented with a code window. Enter the following into the code window and click Deploy. The namespace variable will need to be whatever is appropriate for the customer:
/**
* Handler that will be called during the execution of a PostLogin flow.
*
* @param {Event} event - Details about the user and the context in which they are
logging in.
* @param {PostLoginAPI} api - Interface whose methods can be used to change the
behavior of the login.
*/
exports.onExecutePostLogin = async (event, api) => {
    const namespace = 'https://getmindful.com' // this should be whatever the company
domain is
    if (event.authorization) {
        console.log('Setting authorization: ',event.authorization );
        // USE THESE TWO LINES FOR OIDC
        api.idToken.setCustomClaim(`${namespace}/roles`, event.authorization.roles);
        api.accessToken.setCustomClaim(`${namespace}/roles`,
    event.authorization.roles);
        // USE THESE TWO LINES FOR SAML
        api.idToken.setCustomClaim(`roles`, event.authorization.roles);
        api.accessToken.setCustomClaim(`roles`, event.authorization.roles);
    }
}
Auth0 via OIDC
Auth0 supports OIDC as a protocol for implementing SSO across applications. It allows developers to integrate OIDC-based authentication and authorization into applications such as Mindful, making it easier to manage user identity and access across multiple platforms and services.
This section covers the Auth0 SSO integration with OIDC. Topics covered:
- Setting up OIDC in Auth0
- Configuring your Mindful Organization
- Adding Role Mappings
Click for OIDC and Auth0 configuration instructions
Set up OIDC in Auth0
- Navigate to Application > Applications.
- Make sure Allowed Callback URLs, Allowed Logout URLs, and Allowed Web Origins contain the correct URLs provided by the Mindful Support team.
- Under Advanced Settings > Grant Types, make sure Implicit , Authorization Code and
Refresh Token are selected.
Configure Your Mindful Organization for OIDC Using Auth0
Now it's time to link the Mindful Organization to your Auth0 OIDC account. This step can only be performed by Mindful staff.
Add Role Mappings (Auth0 to Mindful)
Now we need to map our Auth0 role to Mindful roles.
- Click Add Role Map.
- For Name, enter the same value that you used for your Auth0 role. Exact capitalization isn't required.
- For Roles, enter the Role or Roles that the user will be assigned when they login and have a matching Rolename.
- If more roles are necessary to map, add those as well. Make sure to click Save to keep your changes.
Auth0 via SAML
SAML is an XML-based standard for exchanging authentication and authorization data between parties, in particular, between an identity provider and a service provider. Auth0 can act as a SAML Identity Provider, allowing users to authenticate and access applications like Mindful through a single sign-on (SSO) process.
This section covers the Auth0 SSO integration with SAML. Topics covered:
- Setting up SAML in Auth0
- Configuring your Mindful Organization
- Adding Role Mappings
Click for SAML and Auth0 configuration instructions
Set up SAML in Auth0
If you followed the instructions for setting up an OIDC application, the additional setup for SAML is simple.
- Go to Applications > Applications and select your application.
- Open the Addons tab.
- Enable the SAML2 WEB APP addon.

- In the modal window that appears, click the Settings tab and make sure the Application Callback URL is configured properly. Contact the Mindful Support team to obtain the correct URL.
- Click Enable or Save.
Configure Your Mindful Organization for SAML Using Auth0
Now it's time to link the Mindful Organization to your Auth0 SAML account. This step can only be performed by Mindful staff.
Add Role Mappings (Auth0 to Mindful)
Now you need to map your Auth0 role to Mindful roles.
- Click Add Role Map.
- For Name, enter the same value that you used for your Auth0 role. Exact capitalization isn't required.
- For Roles, enter the Role(s) that the user will be assigned when they log in with a matching Role name.
- If more roles are necessary to map, add those as well. Make sure to click Save to keep your changes.
Azure AD
Azure AD is an identity and access-management service that integrates with a variety of applications and services. It offers multi-factor authentication and conditional access policies, which can be used to secure access to Mindful via SSO.
This section covers the Azure AD SSO integration. Topics covered:
- Adding users
- Setting up Application Roles
- Assigning users to groups
- Assigning users to your application
Click for Azure AD configuration instructions
For instructions on configuring Azure AD, see this getting started guide from Azure.
Add Users
- Navigate to Azure Active Directory > Users, then click New User.
- Fill in the required fields to create a new user. If Groups or Roles are already configured, you can link those here as well.
(Optional) Set up Application Roles
There are two group concepts in Azure AD: Groups and Application Roles. Either one can be sent as a custom claim to Mindful, but each has its own configuration requirements. Regardless of the method you choose, you will still need to assign users to your application.
NOTE
If you do not plan to use Application Roles, skip this section.
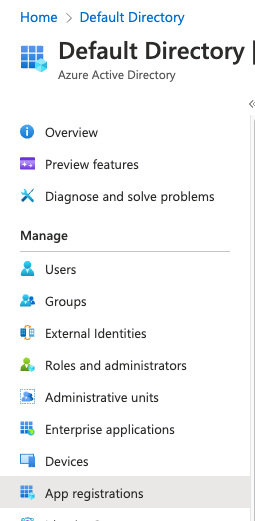
- From your Azure active directory select App registrations.
- Navigate to your application.
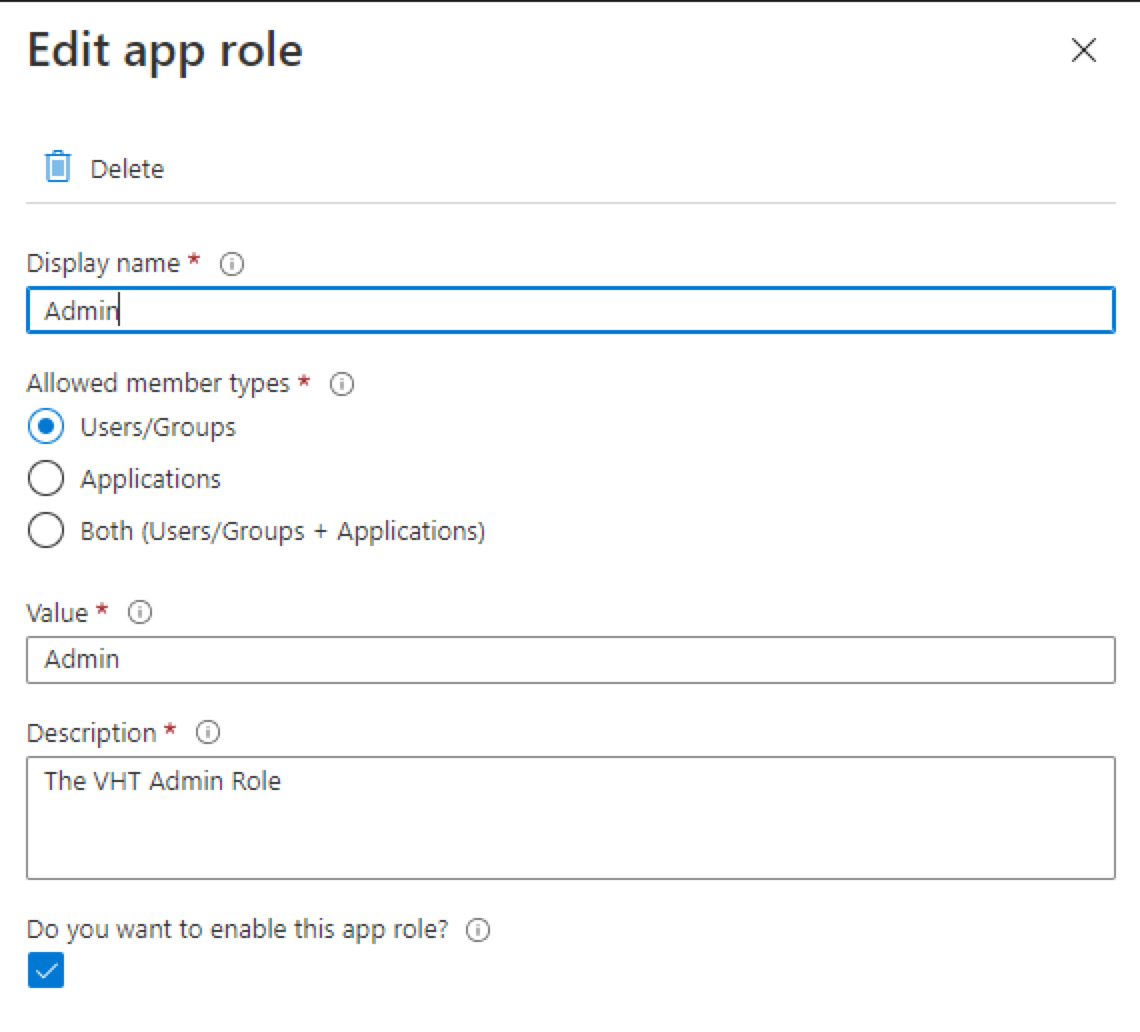
- Click App roles, then click Create app role. Make sure Allowed member types is set to Users/Groups or Both.


Assign Users to Groups
- Navigate to Users.
- Click the user you wish to update.
- Click the Groups side navigation link.
- Click add memberships.
- Select the user(s) you wish to add to the group.
Assigning Users to Your Application
- Navigate to Enterprise Applications > Your application.
- Click Assign users and groups, then click Add user/group.
- Select the user(s) you wish to assign the role.
- Select the application role you wish to assign to the user(s). This can be the default user role if you're not using groups.

- Click Assign.
This will add another row to the Users and groups list. You should see the new row with your assigned role.
Azure AD via OIDC
Azure AD supports OIDC as a protocol for implementing SSO across applications. It allows developers to integrate OIDC-based authentication and authorization into applications such as Mindful, making it easier to manage user identity and access across multiple platforms and services.
This section covers the Azure AD SSO integration with OIDC. Topics covered:
- Setting up OIDC in AzureAD
- Generating a Client Secret
- Adding group claims to the application
- Adding application roles to OIDC
- Assigning users to OIDC
- Configuring your Mindful Organization
- Adding Role Mappings
Click for OIDC and Azure AD configuration instructions
Set up OIDC in Azure AD
- Navigate to Azure Active Directory > App Registrations and click New Registration.


- Here we configure the application's Redirect URI. Contact the Mindful Support team for the correct URI.
- Create the application. Once the application has been created, take note of the Application (client) ID and the Directory (tenant) ID. Both will be used later for the client ID and issuer, respectively.

- Navigate to your OIDC application and click Certificates & secrets.
- Next, click New Client Secret.
- Copy the value of the generated client secret.
IMPORTANT
The Client Secret will be used later and cannot be retrieved again without regenerating another secret.

Generate a Client Secret
- Navigate to your OIDC application from Azure Active Directory > App Registrations.
- Click Certificates & secrets, then click New Client Secret.
- Enter a description and an expiration date (defaults to six months).
- Copy the value of the generated secret (not the secret ID) as this will be used later and cannot be retrieved again without regenerating another secret.
- Store this value somewhere secure for reference later (If you missed this step you can delete the current secret and generate another in order to copy the value).

Add Group Claims to the application
- Navigate to your OIDC application.
- Click Token Configuration.
- Click Add groups claim and make sure the following is selected. This should allow the groups claims to come across in the ID token, Access Token and SAML attributes.

Add Application Roles to OIDC
- From your Azure active directory, select App registrations.
.png?sv=2022-11-02&ss=b&srt=o&spr=https&st=2024-04-19T13%3A49%3A02Z&se=2024-04-19T13%3A59%3A02Z&sp=r&sig=fcwYswE1Zvqf4MHxJg8PgCH8ho6QZUp6lZ%2BpS7GzDA4%3D)
- Navigate to your application.
- Click App roles, then click Create app role. Make sure Allowed member types is Users/Groups or Both.

Assign Users to OIDC
- Navigate to Enterprise Applications > Your application.
- Click Assign users and groups, then click Add user/group.
- Select the user or users you wish to assign the role.
- Select the application role you wish to assign to the user or users. This can be the default user role if using groups.
.png?sv=2022-11-02&ss=b&srt=o&spr=https&st=2024-04-19T13%3A49%3A02Z&se=2024-04-19T13%3A59%3A02Z&sp=r&sig=fcwYswE1Zvqf4MHxJg8PgCH8ho6QZUp6lZ%2BpS7GzDA4%3D)
- Click Assign.
- This will add another row to the users and groups list. You should see the new row with your assigned role.
Configure your Mindful Organization for OIDC using Azure AD
Now it's time to link the Mindful Organization to your Azure AD OIDC application. This step can only be performed by Mindful staff.
Add Role Mappings (Azure AD Group to Mindful)
Now you need to map your Azure AD Group to Mindful roles.
- Click Add Role Map.
- If you are using Azure AD Groups: For Name, enter the Group ID of the group you created in Azure AD. The Group ID can be found by going to Azure > Groups. Select the group and look for an Object ID field. This is the UUID (aka Group ID) for the group. If you are using Azure Application Roles, enter the name of the role you created and assigned to your users.
- For Roles, enter the role or roles that the user will be assigned when they log in with a matching Role name.
- If more roles are necessary to map, add those as well. Make sure to click Save to keep your changes.
Azure AD via SAML
SAML is an XML-based standard for exchanging authentication and authorization data between parties, in particular, between an identity provider and a service provider. Azure AD can act as a SAML Identity Provider, allowing users to authenticate and access applications like Mindful through a single sign-on (SSO) process.
This section covers the Azure AD SSO integration with SAML. Topics covered:
- Setting up SAML in Azure AD
- Adding group claims
- Adding application roles to SAML
- Assigning users to SAML
- Adding an application roles claim
- Configuring your Mindful Organization
- Adding Role Mappings
Click for SAML and Azure AD configuration instructions
Set up SAML in Azure AD
- Navigate to Azure Active Directory > Enterprise Applications, then click New Application.
- Select Create your own application.
- Name the application and make sure Integrate any other application you don't find in the gallery is selected.
- Once created, you will be taken to the application Overview page.

- Click Set up Single Sign-On and choose SAML.
- The first box will have two required entries. Select the Edit button for this first box.

- The Identifier(Entity ID) will be the Cognito user pool URN. Contact the Mindful Support team to obtain the correct value.
- The Reply URL will be the callback URL to Mindful. Contact the Mindful Support team to obtain this value, as well.
Add Group Claims
- In the second box in the Set up Single Sign-On with SAML section, click the Edit button.
- Click Add a group claim.
- Select which groups are to be included in the claim. This will depend on the client's requirements, but All Groups is a good selection for testing. The Source attribute should be Group ID.
Add Application Roles to SAML
NOTE
If you do not plan to use Application Roles, skip this section.
- From your Azure active directory, select App registrations.
.png?sv=2022-11-02&ss=b&srt=o&spr=https&st=2024-04-19T13%3A49%3A02Z&se=2024-04-19T13%3A59%3A02Z&sp=r&sig=fcwYswE1Zvqf4MHxJg8PgCH8ho6QZUp6lZ%2BpS7GzDA4%3D)
- Navigate to your application.
- Click App roles, then click Create app role. Make sure Allowed member types is Users/Groups or Both.
.png?sv=2022-11-02&ss=b&srt=o&spr=https&st=2024-04-19T13%3A49%3A02Z&se=2024-04-19T13%3A59%3A02Z&sp=r&sig=fcwYswE1Zvqf4MHxJg8PgCH8ho6QZUp6lZ%2BpS7GzDA4%3D)
Assign Users to SAML
- Navigate to Enterprise Applications > Your application.
- Click Assign users and groups, then click Add user/group.
- Select the user or users you wish to assign the role.
- Select the application role you wish to assign to the user or users (Can be the default user role if using groups).
.png?sv=2022-11-02&ss=b&srt=o&spr=https&st=2024-04-19T13%3A49%3A02Z&se=2024-04-19T13%3A59%3A02Z&sp=r&sig=fcwYswE1Zvqf4MHxJg8PgCH8ho6QZUp6lZ%2BpS7GzDA4%3D)
- Click Assign.
- This will add another row to the Users and groups list. You should see the new row with your assigned role.
Add the Application Roles Claim
- In the second box in the Set up Single Sign-On with SAML section, click Edit.
- Click Add new claim.
- Name the new claim roles.
- The Source should be Attribute.
- The Source attribute field should be user.assignedroles
Configure your Mindful Organization for SAML using Azure AD
Now it's time to link the Mindful Organization to your Azure AD SAML account. This step can only be performed by Mindful staff.
Add Role Mappings - Azure AD Group to Mindful
Now we need to map our Azure AD Group to Mindful roles.
- Click Add Role Map.
- If you are using Azure AD Groups: For Name, enter the Group ID of the group you created in Azure AD. The Group ID can be found by going to Azure > Groups. Select the group and look for an Object ID field. This is the UUID (aka Group ID) for the group. If you are using Azure Application Roles, enter the name of the role you created and assigned to your users.
- For Roles, enter the Role or Roles that the user will be assigned when they log in with a matching role.
- If more roles are necessary to map, add those as well. Make sure to click Save to keep your changes.
Was this article helpful?